In this blog, Cassandra speaks with Manes by Mell to put together a hair routine for her curly hair. Step by step, Mell is going to help us cover how to embrace and care for luscious locks!
Step 1: Mell says, “Use a clarifying shampoo.”
“Cassandra’s scalp type is acne-prone, she has drier ends, and she goes back and forth between wearing it curly and straight. When you have an oily scalp but dry ends, how do you find the balance? The first step to a proper routine would be to go in with clarifying shampoo. A lot of people will avoid using a clarifying shampoo out of fear that it will make their hair dry. But, you don’t want to continue adding moisturizing products because that can cause build-up. That build-up can prevent shine which can also come from heat damage. Every once in a while, we need to release our hair so other treatments we put on can penetrate. We also need to combat pollution and hard water build-up if that is a concern where you live.”
“You can use the clarifying shampoo every couple of washes after swimming or sweating a lot too. Washing your hair every other day is good, but whatever works best for your scalp is good also. It’s just best to prioritize scalp care.”
Cassandra washes her hair at night and will go to bed with it wet, but Mell says that you don’t want to go to bed with a moist scalp environment. That can contribute to build-up forming on the scalp.
Step 2: Prep the hair for styling
Mell says, “We style the hair when it is wet and freshly washed. Styles always work best with freshly washed hair. Once the hair is wet, we go in with our prep product. If you style your hair while it’s soaking wet or fresh out of the shower, you will get a more chunky, moisturized curl, but perhaps curls that won’t last as long. But, if you style on damp hair, it’s going to have more volume. You just want the hair to be saturated with water so your hair can absorb the prep products well.”
“When you have curly hair, it’s okay to use a brush when the hair is wet. Feel free to detangle with a brush when your hair has conditioner. Using a brush is going to add so much definition and give the hair shine. It also helps distribute products. You can use a leave-in conditioner on the ends. Put a little dollop, rub it around on the hands, and massage it through the hair shaft and the ends. Leave-in conditioner also helps the hair retain moisture. Using a conditioner with glycerin can be helpful.”

Mell applying leave-in conditioner
Step 3: Use a curl creme
Verb Curl Leave-In (light lotion) - $20
-use code MELL10 for 10% off at checkout!
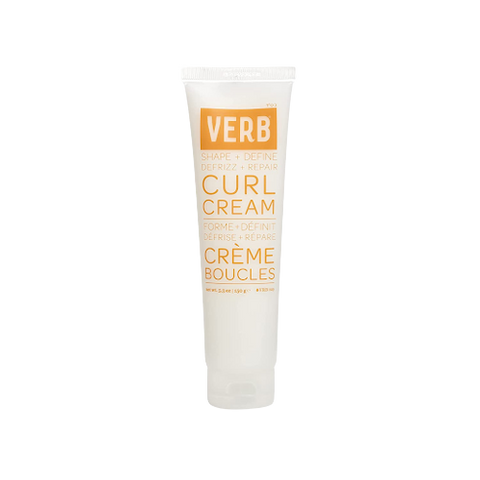
Mel says, “Emulsify the gel by rubbing it in your hands. So, you can distribute the product without using too much. Starting from the bottom, comb the gel through and work your way towards the scalp, but keep it about 2 inches away from your scalp. You don’t need it on your scalp. To work the product through the hair, use a brush and smoothing motion instead of crunching the product into your hair because that can cause a little bit of frizz. You want to keep the cuticles nice and laid. Then you’ll use the brush again because it helps distribute the products, and it’s truly going to help you define the curls. When you have fine hair, less is more, especially if you’re going for a volume routine.”
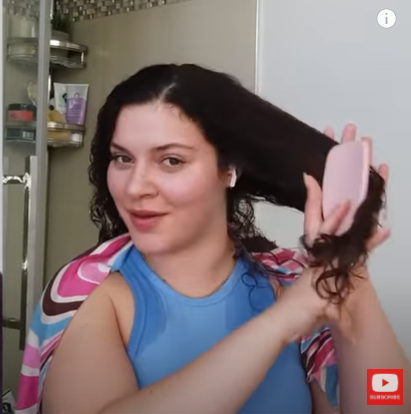
Mell distributing the curl cream with a brush
Step 4: Use a foaming gel
NEW Manes by Mell x Verb Curl Foaming Gel- DISCOUNT CODE MELLCFG * - $20
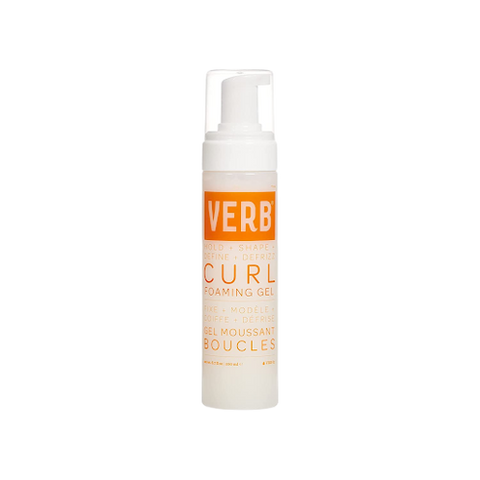
“If you’re really dry, you can just use the curl creme. But if you’re struggling with getting your curls to last or hold, we often need a gel mousse or foam to keep those curls intact. All hair types can use the Verb Curl Leave-in. It’s lightweight and water-based, and it’s going to give us beautiful curl definition. You can start off with 3 pumps. Focusing on the mid-hair shaft and ends, comb it through with your fingers. This distributes it beautifully through the hair, and it does not feel crunchy or sticky. These products will help to seal cracks in our hair cuticle and give us that protective coating over our hair and give us shine. Hair products are similar to putting on makeup or sunscreen,” Mell says.
Cassandra thinks this product is amazing too, and it feels like a light foam that turns into a serum.
Step 5: Define the curls
“You can clip up half of your hair or section it if you have very dense hair like Mell. Take a section or chunk of your hair and brush. The section should be about 1-2 inches thick. You can use your finger to part your hair as well. Slide it along your scalp and part the hair. Parting the hair ensures that you’re not going over the same section.”
“Don’t make the section too small because the curls can end up looking stringy. Generally, the bigger the curls you have – the bigger section you want to take. If you have less wide curls you might want to take smaller sections that way you can treat every section. Place the brush under the section of hair. So, the bristles should be facing upwards.”

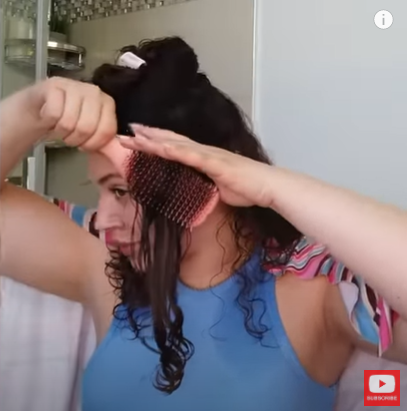
“Then, smooth the brush downwards. It’s good to place your hand on the spine of the brush. There should be a nice slip. After brushing, the hair is going to look straight at first. But then, you scoop and squish the hair with your hands, and this will produce gorgeous, frizz-free curls.
So, don’t scrunch too much. Because the more and more you touch the hair, the greater the potential there is for frizz. If your hair is not squishing easily, that means you don’t have enough moisture in your hair. You don’t have to add more product. Just add some more water. It’s normal for the hair to dry a little during the process.”
“If necessary, take a little more of the foam, distribute evenly, scoop, and scrunch gently.”
Step 6: Dry the hair
“There are a few ways you can dry the hair. If your hair is really wet, one way is using a microfiber towel. If not, using a towel may not even be necessary. To dry, gently scrunch the hair with the microfiber towel. You can also root clip your hair. This is when you place clips at the top of your hair. This is going to help lift the hair off of your root which is fabulous at keeping your hair out of your face. Your hair is going to dry where it’s clipped so you want to strategically place them. This helps you not to get a flat crown.”
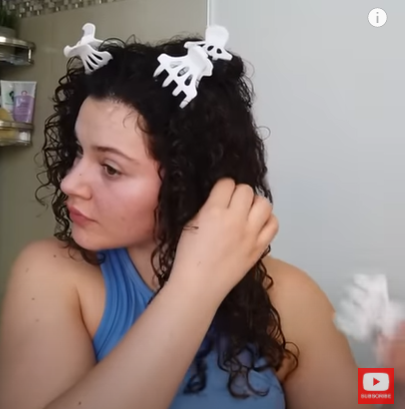
“Doing this can also help the scalp dry faster. You can also air dry or blow dry your hair with a diffuser. Diffusers part and evenly distribute airflow so you don’t have a strong stream of air on your curls. Diffusers dry your hair in a controlled state, and you can use a cold setting. While drying the hair, the less you can touch it – the better it’s going to look.

Mell blow drying her hair. Cassandra did not have a diffuser. So, they had to improvise with a colander!
"If you see any strands or frizziness, it’s okay to go back and spot treat while the hair is still wet. If you want to spot treat, wet your hand and pump a little foaming gel. Then, smooth it over that area. After that, if this smoothing motion straightens your hair, wrap it around your finger like it’s a curling wand
Now, when the hair feels dry, that’s good. This is setting the curls, and they’ll be more resilient as opposed to letting it air dry.”
Step 7: Remove the clips
“When it’s almost dry, remove the clips. When we remove them, the hair can settle. Gently unclip the hair. If there are still frizzies, wet your brush, and brush under the hair as we did in the beginning and wrap it around your finger.”
The results
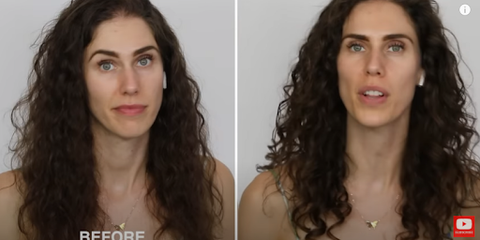
Cassandra was very happy with the results of styling with Mell, and she was so excited about using this technique to define and embrace her curls!

